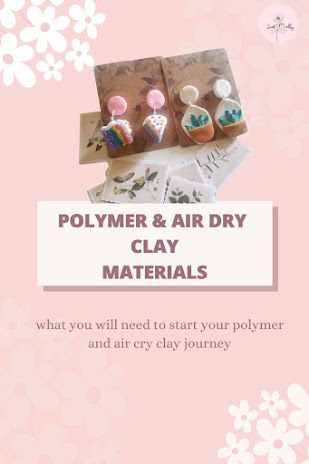
Polymer and Air Dry Clay accessories making, just differ when it comes to what type of clay you're using. But if what you intend for the output is just the same... like making accessories, badges and keychains. The price is the only thing that set them apart from their main component.
Personally, I create Chibi Clay using Air Dry Clay and sometimes for keychains as well. I don't really use it for making accessories but more in to making magnets and displays. The texture is a bit more soft and somewhat leaves a feeling of a bit wetness, but not so much.
Polymer is much more controllable when it comes to shaping it to the form that I want. It is sturdy, but still depends what brand of clay you're using and consider the quality if you've been given an old or a new stock. It hardens like a rock when it's already old. Though, fear not because there's also a product that you can use to get it back to its original state.
Polymer Clay Must Haves
1. Cake Board - The most basic thing that you can have is a cake board. You don't really need a fancy silicone mat, though you may use like that one too if you prefer. But you can use a cake board to place your clay and roll it around on it. It won't stick because of it's glossy texture. Remember to clean it as well.
2. Oven - Oven toasters can be a really good type of oven you can use for baking polymer clay. Heavy duty ones are good as well as it has a bigger capacity. I suggest that you really separate your food oven and polymer clay oven. Because, although we might not see or smell the chemicals that is being released whenever we bake polymer, it is better to be safe than sorry. Microwave-oven shouldn't be used as well, as it has its own different function.
There are other materials around your house that you can use too for texturing like toothpicks, hair pin, toothbrush, makeup brush, glass as your rolling pin, D.I.Y. cutters and more, you just have to think out of the box.
3. Sculpting tools - Buying a set of sculpting and dotting tools to give your life some ease will make sculpting simpler and quicker. Needle tool and X acto knife are my favorite!
4. Pliers - Used to open and close metal findings and some pliers can cut metal as well. If you wish to create a bracelet and prefers it at a specific length, you may use that specific tool to cut the metal.
5. Hooks & Metal Findings - These are the metals that you use to connect one piece from the other. May it be fish hooks; earrings, flat key ring; keychains, bar pins; badges.
6. Gloss/Resin - If you're looking for something to finish off your craft, you may either put gloss, matte or resin on it.
7. Dremel - Smoothen the hard edges and put out holes in each of your pieces.
Some extras: Super glue, Acrylic paint, Silicone Molds, Texture Stamp, Polymer Clay Cutters.
Air Dry Clay
The tools that you will be needing is slightly a-like with making polymer clay crafts, but you may choose to use a wax paper instead of card board if the type of air cry clay that you're using is the pottery type of air dry clay.
I've used a few that comes in small packets in different colors. Those are the locally made ones and most probably are homemade. Be careful, when placing your air dry clay craft. If you made the clay at home and decided to experiment it can attract pests and insects leading to a feast for them leaving your project damaged, because they tend to eat it. Some air dry clay are made of food ingredients like cornstarch/flour/vinegar, it really depends where you get the ingredients.
But most of the time, people prefer painting on air dry clay crafts, you can use acrylic paint for this. Yes, you don't need an oven. It is best to put it on a safe place to dry.


Comments
Post a Comment
Hello My Lovely Readers and Co-Bloggers ! Thank you so much for all your Wonderful Comments ! I'll try as much as possible to reply to them all :)